复活旧版HEXO 最近一次写博客已经是几年前了,几年前HEXO版本号还是很低,用的是2.5.6版本,PACMAN主题也已经多年未更新了,nodejs版本也跨度很大,在电脑上使用npm安装最新版本HEXO惊奇的发现竟然还可以正常生成正确的网页,只需在主题里面稍加修改几步即可,也可clone我的github repo里面已经包含修改过的主题。
HIGHLIGHT配置项迁移 将原本放在HEXO配置_config.yaml的HIGHLIGHT配置项复制迁移到PACMAN的_config.yaml配置项下即可,如下:
1
2
3
4
highlight: enable: true line_number: true tab_replace:
至此理论上生成的文章主体已经没啥大问题了,其他功能还有一些小TIPS。
修复文章二维码 PACMAN多年前默认使用JIATHIS.js生成微信分享文章二维码,该网站已经长久故障,改成jquery的QRCODE模块前端生成即可。themes/pacman/source/js/jquery.qrcode-0.12.0.min.js。themes/pacman/layout/_partial/after_footer.ejs。
1 2 3 4 5 6 7 8 9 10 11 12 <script src="<%- config.root %>js/jquery.qrcode-0.12.0.min.js" ></script> ... $('#qrcode-pic' ).qrcode ({text : url, render : 'img' , }); $('.qrcode' ).hide (); $('.article-share-qrcode' ).click (function ( $('.qrcode' ).toggle (); }); $('.qrclose' ).click (function ( $('.qrcode' ).hide (); });
修复作者头像图片 修改PACMAN里面_config.yaml内部的
1
2
3
author_img: img/author.jpg #改为 author_img: ../img/author.jpg
至此主题部分完全迁移完毕,没有问题,然后修改HEXO的_config.yaml对照最新版配置稍作修改兼容即可。
写作环境搭建 HEXO迁移到Docker 近来移动设备、平板、手机等越来越多,需要许多时候可以直接在移动设备上码字发布文章,因此在各种设备上安装nodejs以及HEXO是没有必要的,因此需要将HEXO变成Docker容器里面运行,在家中服务器上运行即可。
编辑器的选择 市面上好的markdown编辑器有许多,但是各种客户端里面体验最好个人觉得还是Typora,但是Typora只有Mac客户端,无法兼顾移动端,跨平台的本地编辑器不同平台体验又各不相同,因此为了获得统一的体验减少学习成本,构想决定使用Web的自托管Markdown在线编辑器,这样不同设备只要安装了浏览器就可以获得一致的编辑体验,无需安装额外APP,成本最小。当然,也可以同时在服务器上安装Code-Server作为电脑端的后备方案。
Docker搭建 将上述所有APP打包到一个Dockerfile里面,编写如下,构建镜像运行即可,这样就一键搭建好了编辑写作环境。
1
2
3
4
5
6
7
8
9
10
11
12
13
14
15
16
17
18
19
20
21
22
23
24
25
26
27
28
29
30
31
32
33
34
35
36
37
38
39
40
41
42
43
44
45
46
47
48
49
50
51
52
53
54
55
56
57
58
59
60
61
62
63
64
65
66
67
68
69
70
71
72
73
74
75
76
77
78
79
FROM node:latestLABEL maintainer="ptbsare" WORKDIR /space ARG DEBIAN_FRONTEND="noninteractive" ARG HEXO_BUILD_VERSION='latest' ARG SB_BUILD_VERSION='latest' ARG VSCODE_BUILD_VERSION='latest' ENV LANG=C.UTF-8 ENV PUID=1001 ENV PGID=100 ENV HOME="/config" ENV SB_HOSTNAME=0.0 .0.0 ENV SB_KV_DB="${HOME}/silverbullet.db" ENV SB_FOLDER="/space" ENV SB_PORT=3000 ENV HEXO_PORT=6000 ENV VS_PORT=9000 ENV ENABLE_WORKSPACE_TRUST='' ENV DEFAULT_WORKSPACE="/space" ENV SOURCE_ROOT="/space" ENV GIT_USERNAME=user ENV GIT_EMAIL=user @mail.comENV GIT_SOURCE='' ENV GIT_DEPLOY='' ENV HEXO_VERSION='latest' ENV SB_VERSION='latest' ENV VSCODE_VERSION='latest' ENV AUTO_UPGRADE_HEXO='' ENV AUTO_UPGRADE_VSCODE='' ENV AUTO_UPGRADE_SB='' RUN \ echo "*** install nodejs hexo and runtime dependencies ***" && \ apt update && apt install -y \ psmisc \ git \ jq \ libatomic1 \ nano \ net-tools \ netcat-traditional \ sudo \ curl \ gosu \ vim \ git \ tar \ && npm install hexo-cli@${HEXO_BUILD_VERSION} -g RUN echo "*** install code-server ***" RUN VSCODE_RELEASE=$([ "$VSCODE_BUILD_VERSION " = latest ] && curl -fsS https://api.github.com/repos/coder/code-server/releases/latest | grep -Po '"tag_name": "\K[^"]+' | sed 's/^v//' || echo "$VSCODE_BUILD_VERSION " ) && \ mkdir -p /app/code-server && \ curl -o \ /tmp/code-server.tar.gz -L \ "https://github.com/coder/code-server/releases/download/v${VSCODE_RELEASE} /code-server-${VSCODE_RELEASE} -linux-amd64.tar.gz" && \ tar xf /tmp/code-server.tar.gz -C \ /app/code-server --strip-components=1 && \ echo "**** clean up ****" && \ rm -rf \ /config/* \ /tmp/* \ /var/lib/apt/lists/* \ /var/tmp/* \ /usr/share/man RUN \ echo "*** install deno ***" && \ curl -fsSL https://deno.land/x/install/install.sh | sh && mv $HOME /.deno/bin/deno /usr/local/bin/deno RUN \ echo "*** install silverbullet ***" RUN SILVERBULLET_RELEASE=$([ "$SB_BUILD_VERSION " = latest ] && curl -fsS https://api.github.com/repos/silverbulletmd/silverbullet/releases/latest | grep -Po '"tag_name": "\K[^"]+' | sed 's/^v//' || echo "$SB_BUILD_VERSION " ) && \ curl -L https://github.com/silverbulletmd/silverbullet/releases/download/${SILVERBULLET_RELEASE} /silverbullet.js -o /silverbullet.js VOLUME /space VOLUME ${HOME} EXPOSE ${SB_PORT} ${VS_PORT} ${HEXO_PORT}ADD entrypoint.sh /entrypoint.sh RUN chmod +x /entrypoint.sh ENTRYPOINT [ "/entrypoint.sh" ]
entrypoint.sh如下:
1
2
3
4
5
6
7
8
9
10
11
12
13
14
15
16
17
18
19
20
21
22
23
24
25
26
27
28
29
30
31
32
33
34
35
36
37
38
39
40
41
42
43
44
45
46
47
48
49
50
51
52
53
54
55
56
57
58
59
60
61
62
63
64
65
66
67
68
69
70
71
72
73
74
75
76
77
78
79
80
81
82
83
84
85
86
87
88
89
90
91
92
93
94
95
96
97
98
99
100
101
102
103
104
105
106
107
108
#!/bin/sh if [ ! $HEXO_VERSION = 'latest' ]; then echo "Installing HEXO@${HEXO_VERSION} " npm install hexo-cli@$HEXO_VERSION -g fi if [ ! $SB_VERSION = 'latest' ]; then echo "Installing SB@${SB_VERSION} " curl -L https://github.com/silverbulletmd/silverbullet/releases/download/${SB_VERSION} /silverbullet.js -o /silverbullet.js fi if [ ! $VSCODE_VERSION = 'latest' ]; then echo "Installing VSCODE@${VSCODE_VERSION} " curl -o \ /tmp/code-server.tar.gz -L \ "https://github.com/coder/code-server/releases/download/v${VSCODE_VERSION} /code-server-${VSCODE_VERSION} -linux-amd64.tar.gz" && \ tar xf /tmp/code-server.tar.gz -C \ /app/code-server --strip-components=1 && \ rm /tmp/code-server.tar.gz fi [ ! -z ${AUTO_UPGRADE_HEXO} ] && \ echo "*** install latest hexo ***" && \npm install hexo-cli@latest -g [ ! -z ${AUTO_UPGRADE_VSCODE} ] && \ echo "*** install latest code-server ***" && \mkdir -p /app/code-server && \CODE_RELEASE=$(curl -sX GET https://api.github.com/repos/coder/code-server/releases/latest \ | awk '/tag_name/{print $4;exit}' FS='[""]' | sed 's|^v||' ) \ && curl -o /tmp/code-server.tar.gz -L \ "https://github.com/coder/code-server/releases/download/v${CODE_RELEASE} /code-server-${CODE_RELEASE} -linux-amd64.tar.gz" && \tar xf /tmp/code-server.tar.gz -C /app/code-server --strip-components=1 [ ! -z ${AUTO_UPGRADE_SB} ] && \ echo "*** install latest silverbullet ***" && \SILVERBULLET_RELEASE=$(curl -sX GET https://api.github.com/repos/silverbulletmd/silverbullet/releases/latest \ | awk '/tag_name/{print $4;exit}' FS='[""]' | sed 's|^v||' ) \ && curl -L https://github.com/silverbulletmd/silverbullet/releases/download/${SILVERBULLET_RELEASE} /silverbullet.js -o /silverbullet.js chsh -s /bin/bash [ ! -z ${GIT_USER} ] && git config --global user.name ${GIT_USER} [ ! -z ${GIT_EMAIL} ] && git config --global user.email ${GIT_EMAIL} if [ ! -z $PUID ] && [ ! -z $PGID ]; then groupadd -g $PGID vsh useradd -u $PUID -g $PGID vsh chown -R $PUID :$PGID $SB_FOLDER args="$@ " USERNAME=vsh chsh -s /bin/bash $USERNAME [ -f $HOME /.gitconfig ] && mkdir -p /home/$USERNAME && cp $HOME /.gitconfig /home/$USERNAME / mkdir -p /home/$USERNAME && chown -R $PUID :$PGID /home/$USERNAME echo "Running as $USERNAME (configured as PUID $PUID and PGID $PGID )" fi [ ! "$(ls -A ${SOURCE_ROOT}) " ] && [ ! -z ${GIT_SOURCE} ] && [ ! -z ${GIT_DEPLOY} ] && git clone ${GIT_SOURCE} ${SOURCE_ROOT} && git clone ${GIT_DEPLOY} ${SOURCE_ROOT} /.deploy_git && chown -R $PUID :$PGID $SOURCE_ROOT if [ -z "$DISABLE_SILVERBULLET " ]; then gosu $USERNAME deno run -A --unstable-kv --unstable-worker-options /silverbullet.js $args & fi if [ -n "${PASSWORD} " ] || [ -n "${HASHED_PASSWORD} " ]; then AUTH="password" else AUTH="none" echo "starting with no password" fi if [ -z ${PROXY_DOMAIN+x} ]; then PROXY_DOMAIN_ARG="" else PROXY_DOMAIN_ARG="--proxy-domain=${PROXY_DOMAIN} " fi if [ -z ${ENABLE_WORKSPACE_TRUST+x} ]; then DISABLE_WORKSPACE_TRUST_ARG="" else DISABLE_WORKSPACE_TRUST_ARG="--disable-workspace-trust" fi chown -R $PUID :$PGID $HOME $DEFAULT_WORKSPACE gosu $USERNAME env HOME=$HOME /app/code-server/bin/code-server --extensions-dir /config/extensions --install-extension ms-ceintl.vscode-language-pack-zh-hans & if [ ! -z ${CODE_PLUGIN} ] ; then gosu $USERNAME env HOME=$HOME /app/code-server/bin/code-server --extensions-dir /config/extensions --install-extension ${CODE_PLUGIN} & fi exec gosu $USERNAME env HOME=$HOME /app/code-server/bin/code-server \ --bind-addr 0.0.0.0:${VS_PORT:-9000} \ --user-data-dir ${HOME:-/config} /data \ --extensions-dir ${HOME:-/config} /extensions \ --disable-telemetry \ --auth ${AUTH} \ ${PROXY_DOMAIN_ARG} \ ${DISABLE_WORKSPACE_TRUST_ARG} \ ${DEFAULT_WORKSPACE:-/config/} exec "$@ "
如果你碰巧服务器使用的是UNRAID系统,那么可以直接使用下面Dockerman模板即可:my-vsh-docker-unraid.xml
1
2
3
4
5
6
7
8
9
10
11
12
13
14
15
16
17
18
19
20
21
22
23
24
25
26
27
28
29
30
31
32
33
<?xml version="1.0" ?> <Container version ="2" > <Name > vsh</Name > <Repository > ghcr.io/ptbsare/ptbsare.github.io/vsh:latest</Repository > <Registry /> <Network > direct</Network > <MyIP > 192.168.195.126</MyIP > <Shell > bash</Shell > <Privileged > false</Privileged > <Support /> <Project > https://hexo.io</Project > <Overview > Hexo blogging docker.
 Web markdown editor runs on default port 3000. (mobile friendly)
 Vscode server runs on default port 9000.
 Default workspace/Blog source repo/Markdown editor space folder: /space
 Vscode config/Home folder/DB folder: /config</Overview > <Category > HomeAutomation: Productivity: Tools:</Category > <WebUI /> <TemplateURL /> <Icon > https://avatars.githubusercontent.com/u/6375567?s=200& amp;v=4</Icon > <ExtraParams > --dns 223.5.5.5</ExtraParams > <PostArgs /> <CPUset /> <DateInstalled > 1717933456</DateInstalled > <DonateText /> <DonateLink /> <Requires /> <Config Name ="/space" Target ="/space" Default ="" Mode ="rw" Description ="" Type ="Path" Display ="always" Required ="false" Mask ="false" > /mnt/user/appdata/vsh/space</Config > <Config Name ="CODE_PLUGIN" Target ="CODE_PLUGIN" Default ="" Mode ="" Description ="" Type ="Variable" Display ="always" Required ="false" Mask ="false" > codeyu.vscode-hexo</Config > <Config Name ="/config" Target ="/config" Default ="" Mode ="rw" Description ="" Type ="Path" Display ="always" Required ="false" Mask ="false" > /mnt/user/appdata/vsh/config</Config > <Config Name ="GIT_USER" Target ="GIT_USER" Default ="" Mode ="" Description ="" Type ="Variable" Display ="always" Required ="false" Mask ="false" > ptbsare</Config > <Config Name ="GIT_EMAIL" Target ="GIT_EMAIL" Default ="" Mode ="" Description ="" Type ="Variable" Display ="always" Required ="false" Mask ="false" > 496725701@qq.com</Config > </Container >
容器会默认在/space文件夹存放源码repo并作为web编辑器以及Code-Server的默认工作区,所有配置选项和变量详见上述文件,基本是开箱即用的,为了得到更好体验,可以安装下面两个插件。
Code-Server插件: Code-Server已经原生有了Markdown支持,只需安装中文语言支持以及在商店下载安装ID为codeyu.vscode-hexo的vsx拓展提供HEXO命令基础支持即可。post_asset_folder: true选项,同时安装hexo-image-link插件。.vscode/settings.json如下:
1
2
3
4
5
{ "markdown.copyFiles.destination" : { "*/**.md" : "${documentBaseName}/${fileName}" } }
这样即能做到编辑器预览文章图片以及HEXO渲染文章图片两不误。
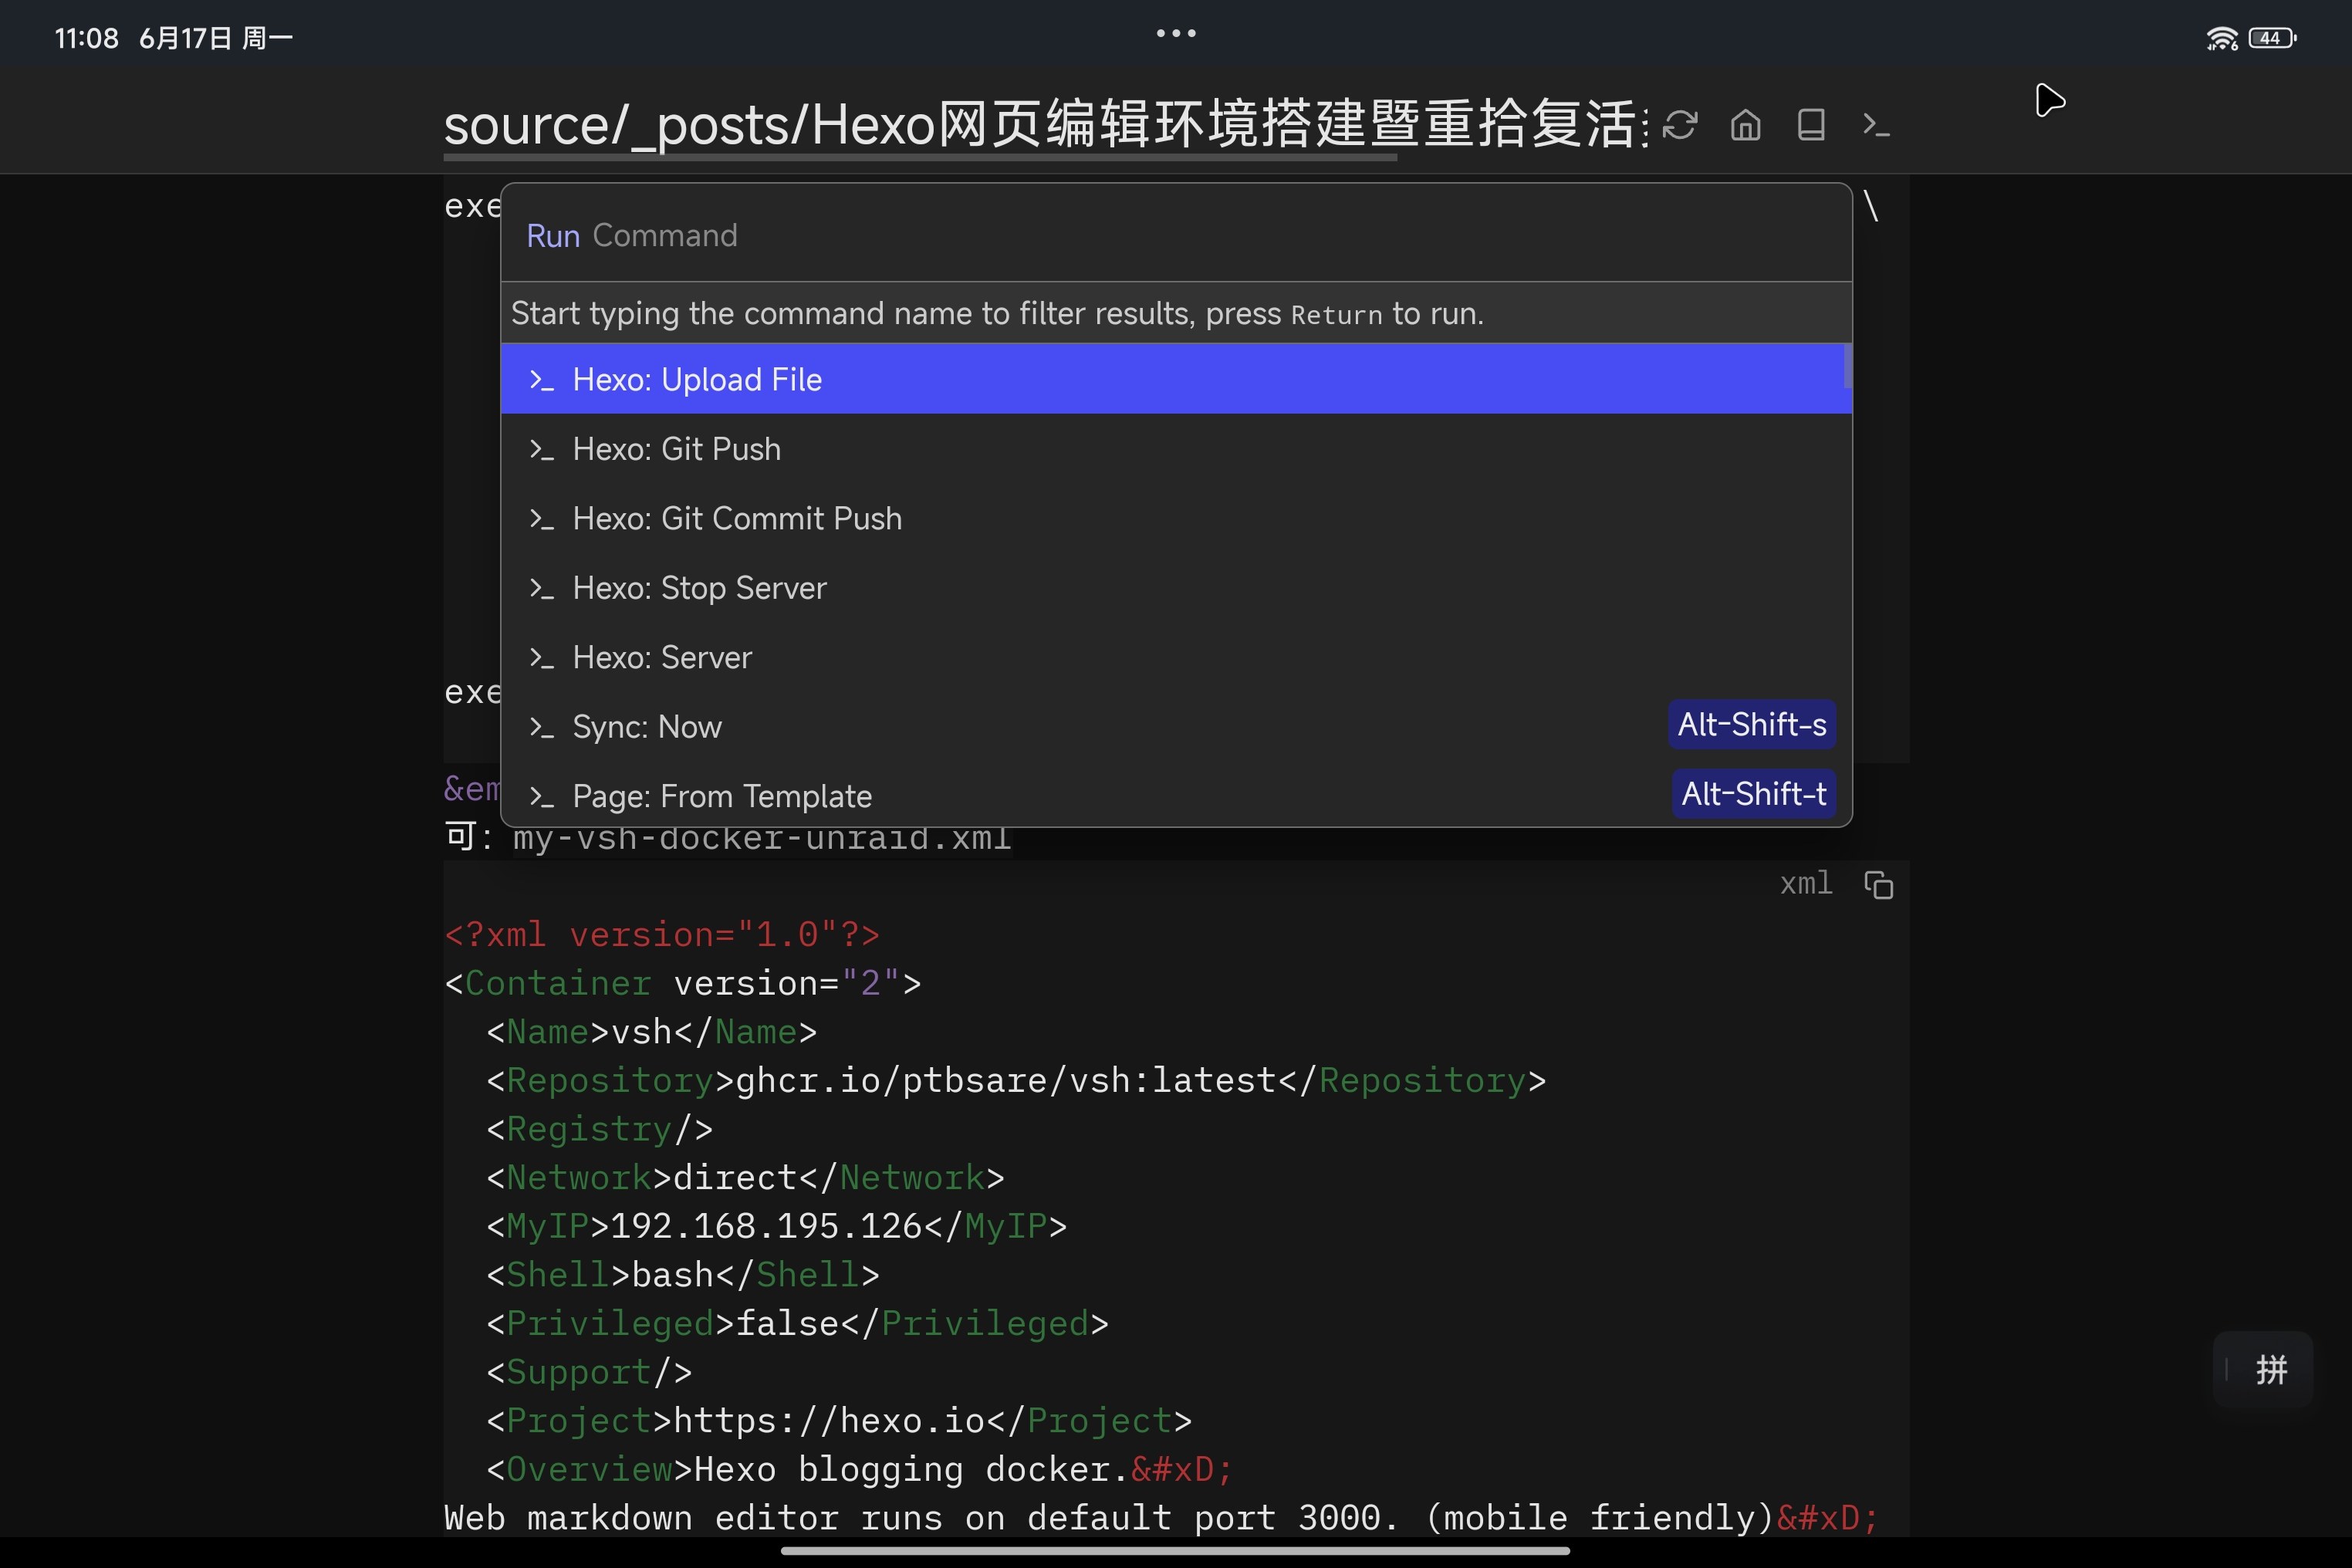
Web编辑器HEXO插件 Code-Server只是一个后备方案,界面太复杂了,我选择的Web编辑器是一个带有模板系统的编辑器,也可以通过插件完善它的功能,因此我自己也对应写了一个HEXO的插件实现了HEXO的各种命令以及GIT的各种命令方便REPO管理以及GITHUB同步与发布,同时该插件也内置Upload File命令也实现了类似Code-Server的自动保存图片到相应文章名目录的功能,适合HEXO编写,感兴趣的可以在这里安装。https://github.com/ptbsare/ptbsare.github.io/tree/main/silverbullet-plug-hexo )
Github自动构建 博客网页自动构建 之前使用的是本地hexo generate && hexo deploy命令编译与发布有点繁琐了,事实上可以通过直接push到Github触发自动的HEXO构建及发布更新,在源码工作区添加.github/workflows/pages.yml内容如下即可:
1
2
3
4
5
6
7
8
9
10
11
12
13
14
15
16
17
18
19
20
21
22
23
24
25
26
27
28
29
30
31
32
33
34
35
36
37
38
39
40
41
42
43
44
45
46
47
48
49
50
name: Pages on: push: branches: - main jobs: build: runs-on: ubuntu-latest steps: - uses: actions/checkout@v4 with: token: ${{ secrets.GITHUB_TOKEN }} submodules: recursive - name: Use Node.js 20 uses: actions/setup-node@v4 with: node-version: '20' - name: Cache NPM dependencies uses: actions/cache@v4 with: path: node_modules key: ${{ runner.OS }}-npm-cache restore-keys: | ${{ runner.OS }}-npm-cache - name: Install Dependencies run: npm install - name: Build run: npm run build - name: Upload Pages artifact uses: actions/upload-pages-artifact@v3 with: path: ./public deploy: needs: build permissions: pages: write id-token: write environment: name: github-pages url: ${{ steps.deployment.outputs.page_url }} runs-on: ubuntu-latest steps: - name: Deploy to GitHub Pages id: deployment uses: actions/deploy-pages@v4
Docker镜像自动构建 还记得之前的一键环境Dockerfile镜像么,想要始终用上最新版本的HEXO/Web编辑器以及Code-Server,也可以借助Github自动构建最新镜像,一键集成最新版本,添加.github/workflows/vsh-docker-publish.yml内容如下:
1
2
3
4
5
6
7
8
9
10
11
12
13
14
15
16
17
18
19
20
21
22
23
24
25
26
27
28
29
30
31
32
33
34
35
36
37
38
39
40
41
42
43
44
45
46
47
48
49
50
51
52
53
54
55
56
57
58
59
60
61
62
63
64
65
66
67
68
69
70
71
72
73
74
75
76
77
78
79
80
81
82
83
84
85
86
87
88
89
90
91
92
93
94
95
96
97
98
99
name: Docker on: schedule: - cron: '35 18 28 * *' push: branches: [ "main" ] env: REGISTRY: ghcr.io IMAGE_NAME: ptbsare/vsh jobs: build: runs-on: ubuntu-latest permissions: contents: read packages: write id-token: write steps: - name: Checkout repository uses: actions/checkout@v4 - name: Install cosign if: github.event_name != 'pull_request' uses: sigstore/cosign-installer@59acb6260d9c0ba8f4a2f9d9b48431a222b68e20 with: cosign-release: 'v2.2.4' - name: Set up Docker Buildx uses: docker/setup-buildx-action@f95db51fddba0c2d1ec667646a06c2ce06100226 - name: Log into registry ${{ env.REGISTRY }} if: github.event_name != 'pull_request' uses: docker/login-action@343f7c4344506bcbf9b4de18042ae17996df046d with: registry: ${{ env.REGISTRY }} username: ${{ github.actor }} password: ${{ secrets.GITHUB_TOKEN }} - name: Extract Docker metadata id: meta uses: docker/metadata-action@96383f45573cb7f253c731d3b3ab81c87ef81934 with: images: ${{ env.REGISTRY }}/${{ env.IMAGE_NAME }} tags: | type=schedule,pattern={{date 'YYYYMMDD'}} type=raw,value=latest,enable={{is_default_branch}} - name: Build and push Docker image id: build-and-push uses: docker/build-push-action@0565240e2d4ab88bba5387d719585280857ece09 with: context: ./vsh/ push: ${{ github.event_name != 'pull_request' }} tags: ${{ steps.meta.outputs.tags }} cache-from: type=gha cache-to: type=gha,mode=max - name: Sign the published Docker image if: ${{ github.event_name != 'pull_request' }} env: TAGS: ${{ steps.meta.outputs.tags }} DIGEST: ${{ steps.build-and-push.outputs.digest }} run: echo "${TAGS}" | xargs -I {} cosign sign --yes {}@${DIGEST}
我自己构建的镜像地址是ghcr.io/ptbsare/ptbsare.github.io/vsh:latest。当然你也可以构建自己的镜像。
Nginx反向代理配置 如果你有域名以及https的需求,需要使用Nginx的反向代理来代理Web编辑器以及Code-Server的相应端口。此部分略过不写,网络上各种方案很多。
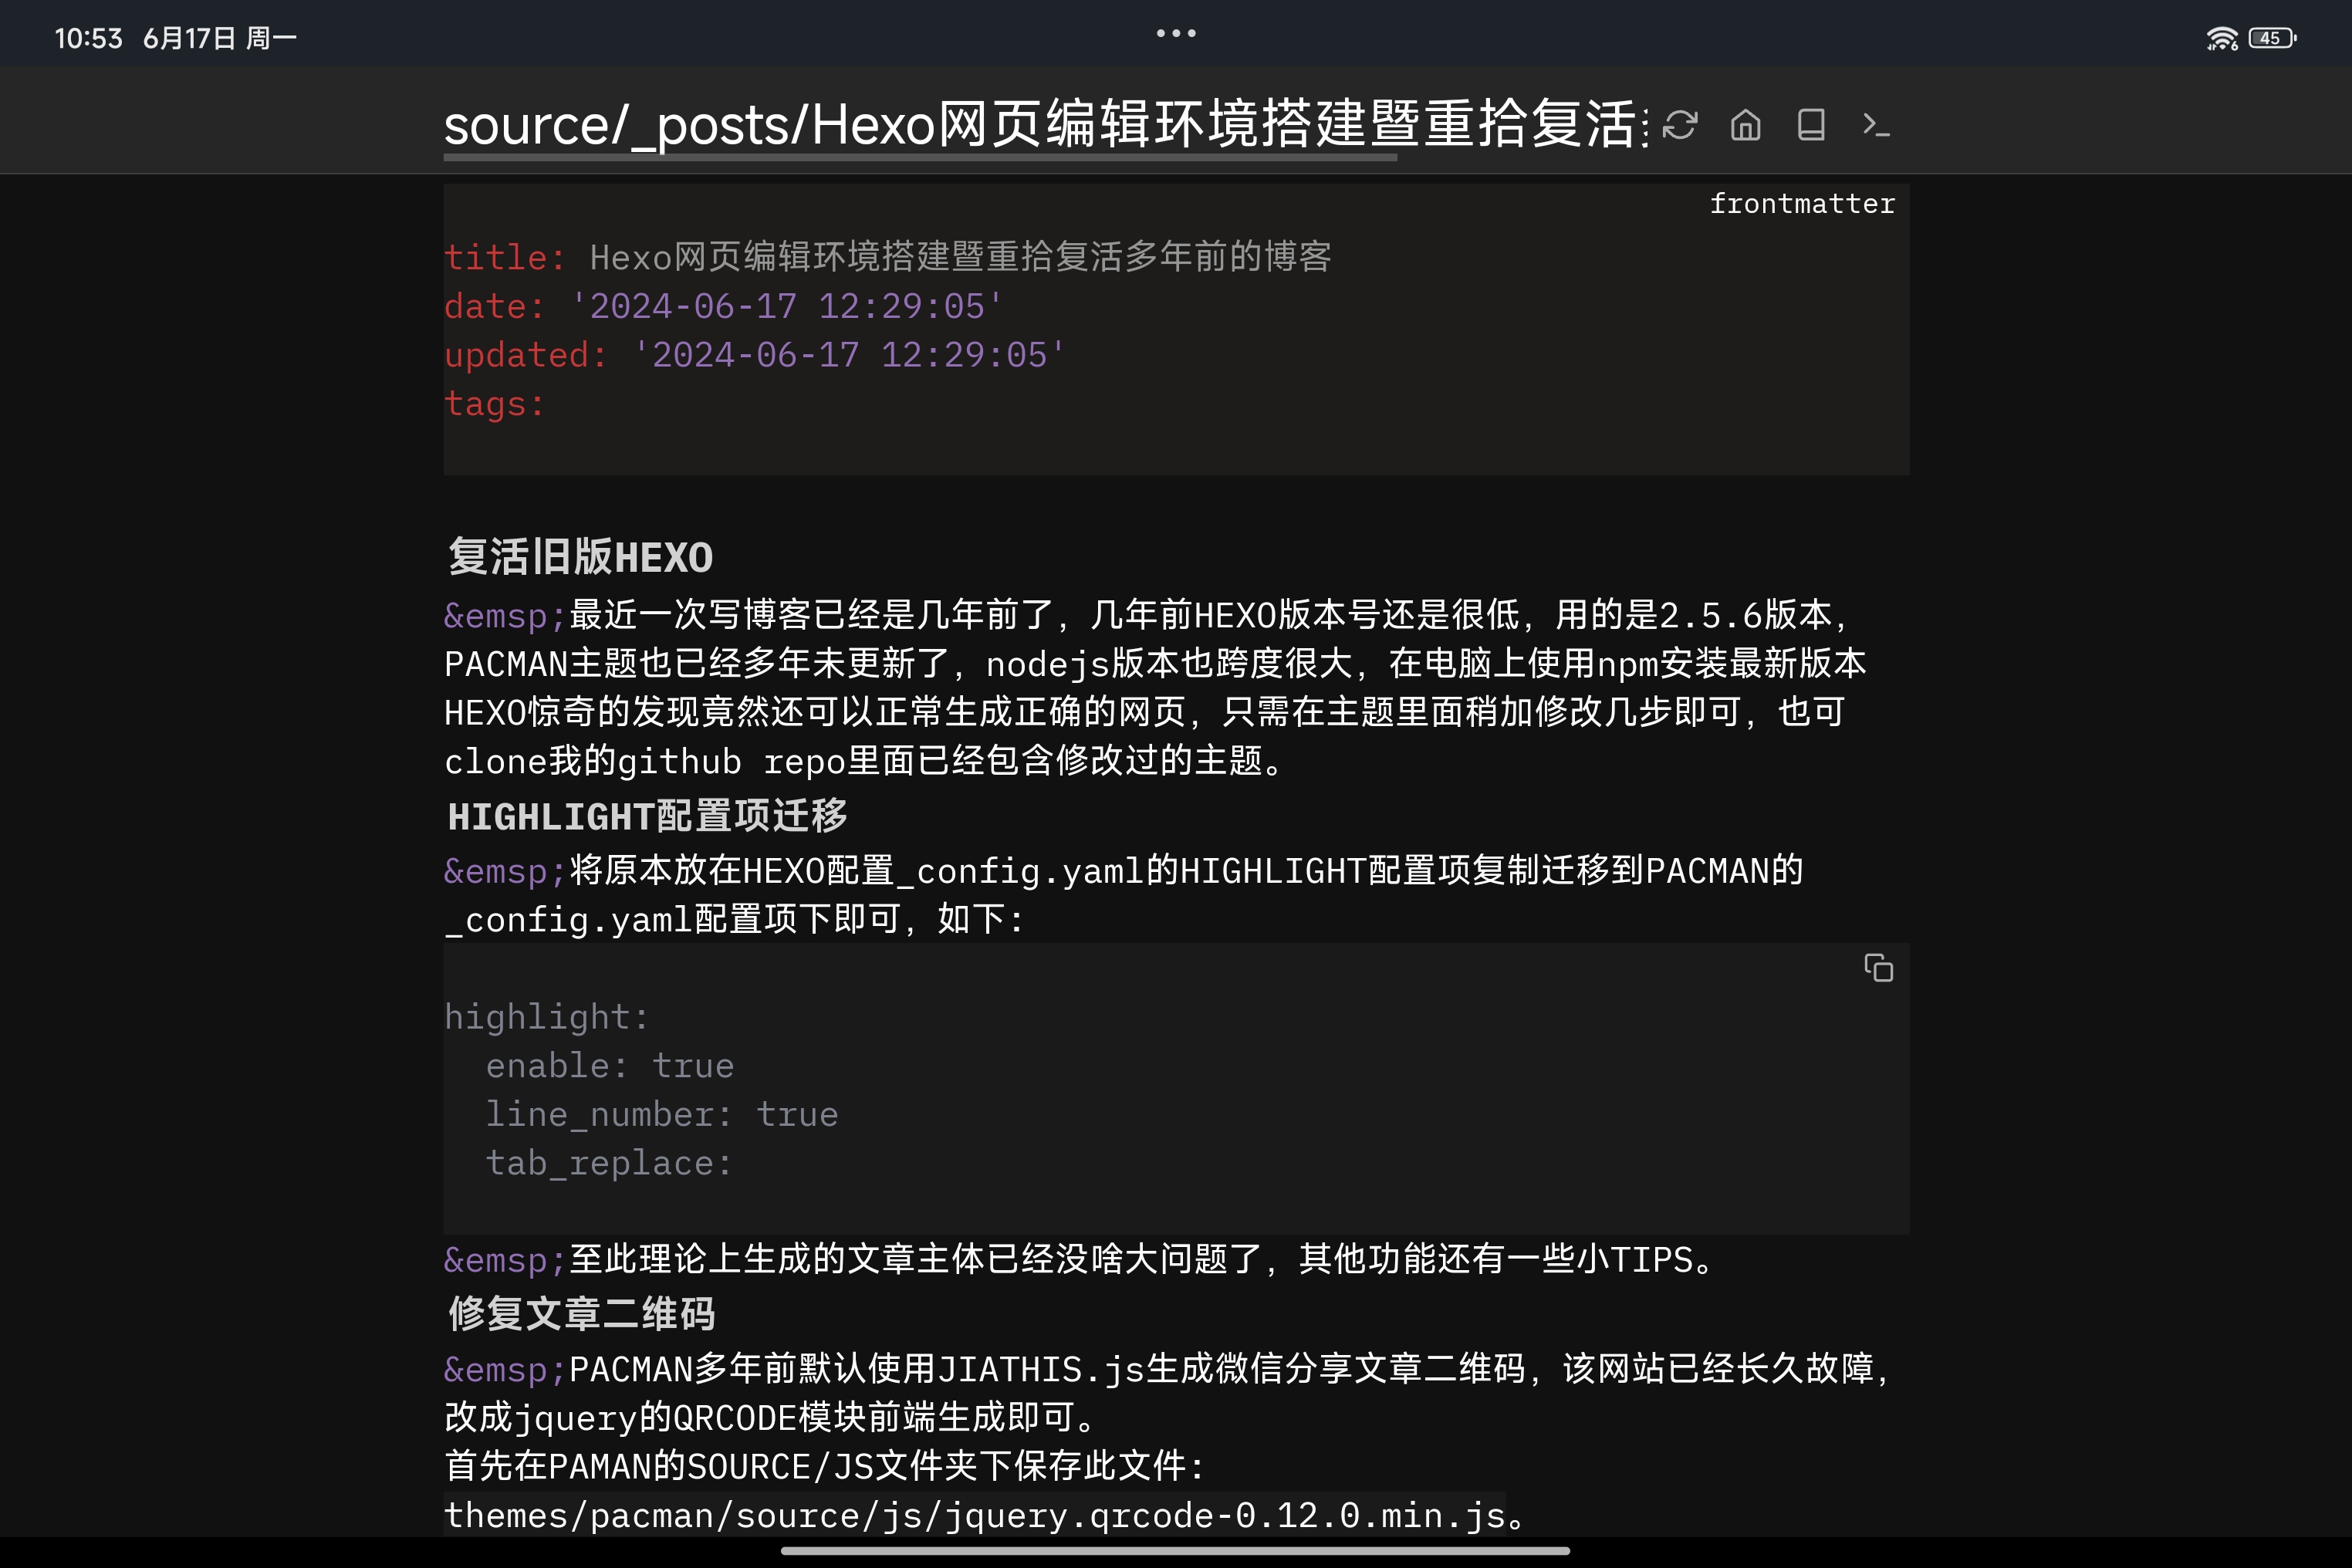
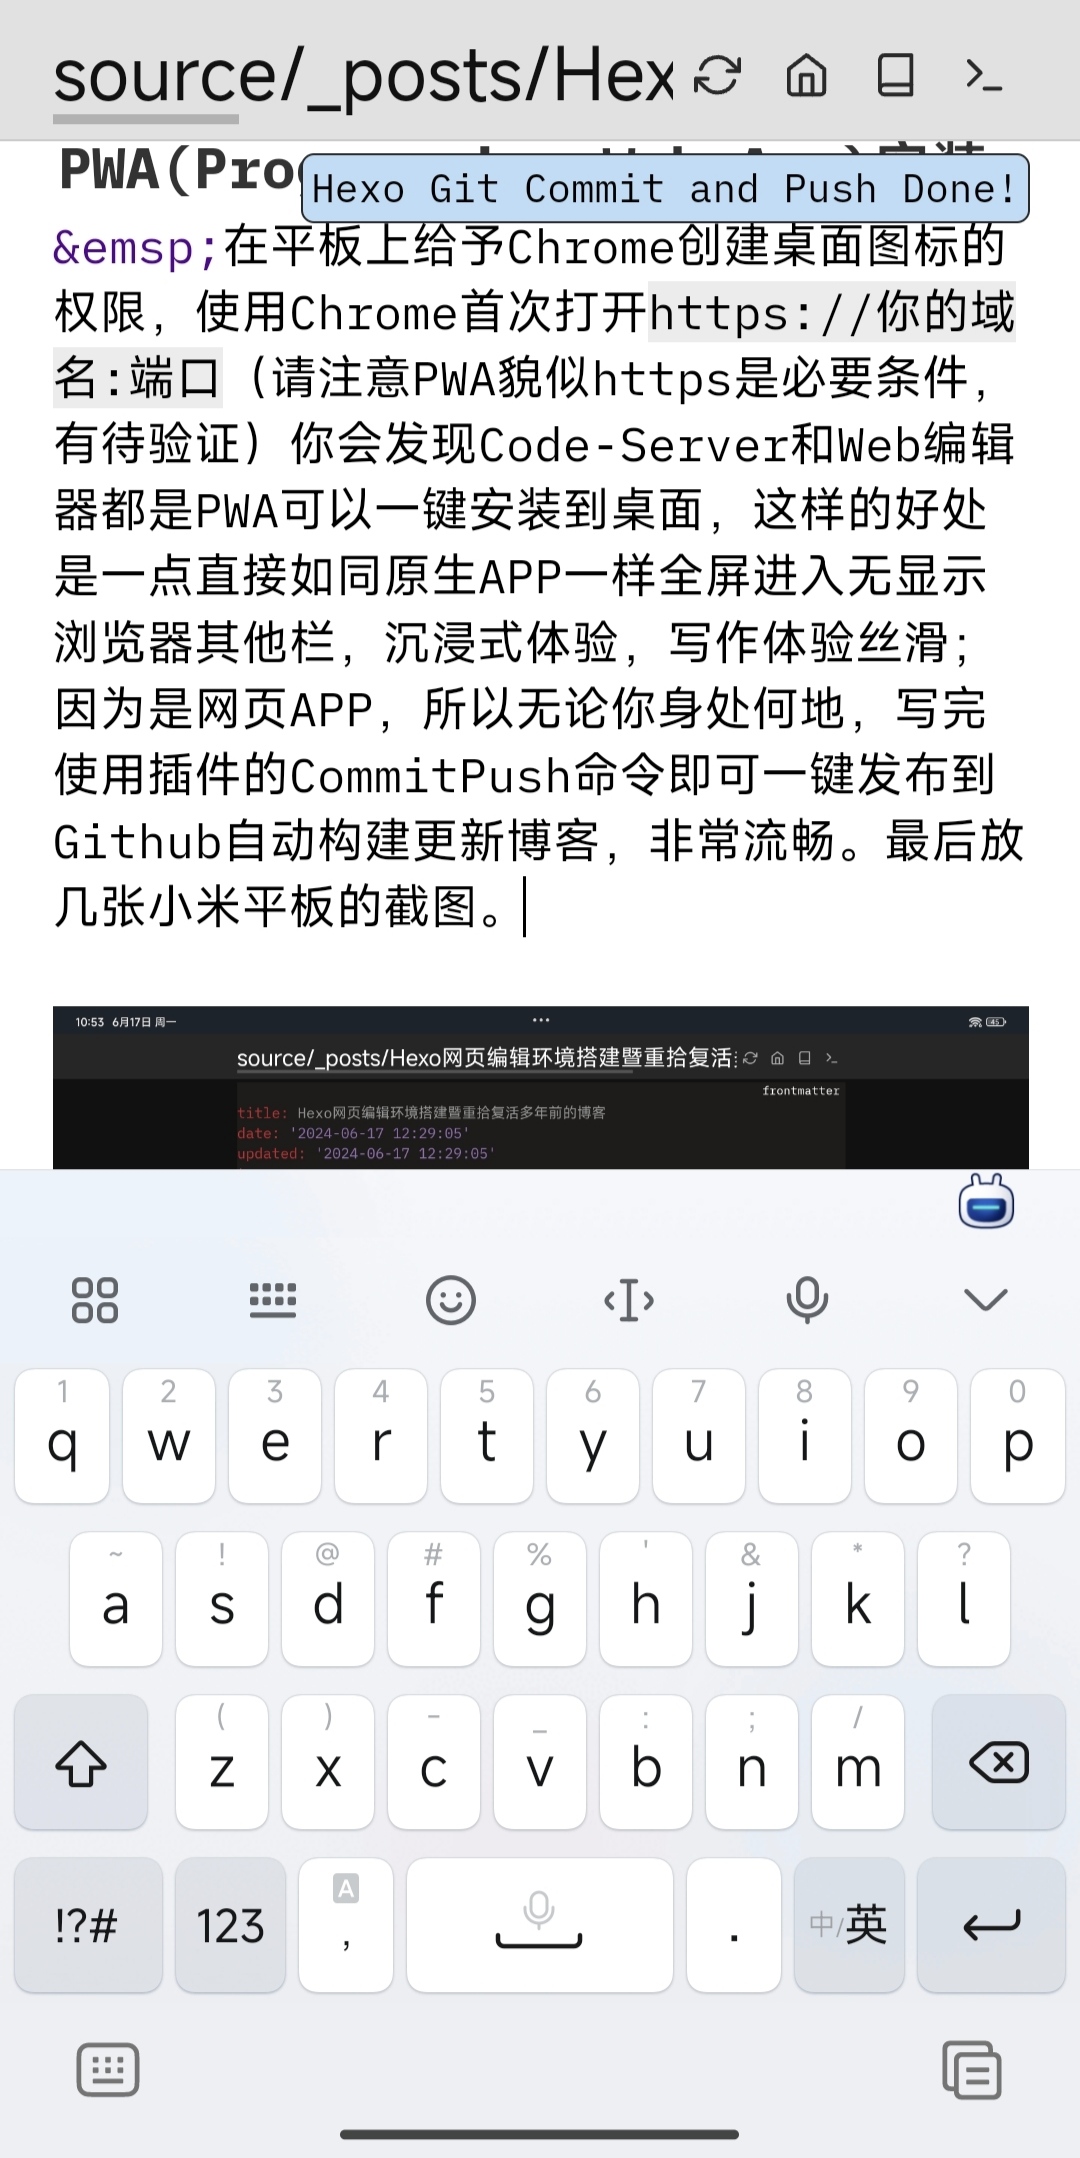
小米平板/iPad等移动设备PWA(Progressive Web App)安装 在平板上给予Chrome创建桌面图标的权限,使用Chrome首次打开https://你的域名:端口(请注意PWA貌似https是必要条件,有待验证)你会发现Code-Server和Web编辑器都是PWA可以一键安装到桌面,这样的好处是一点直接如同原生APP一样全屏进入无显示浏览器其他栏,沉浸式体验,写作体验丝滑;因为是网页APP,所以无论你身处何地,写完使用插件的CommitPush命令即可一键发布到Github自动构建更新博客,非常流畅。最后放几张小米平板和移动端手机的截图。


